 Save to Pinterest
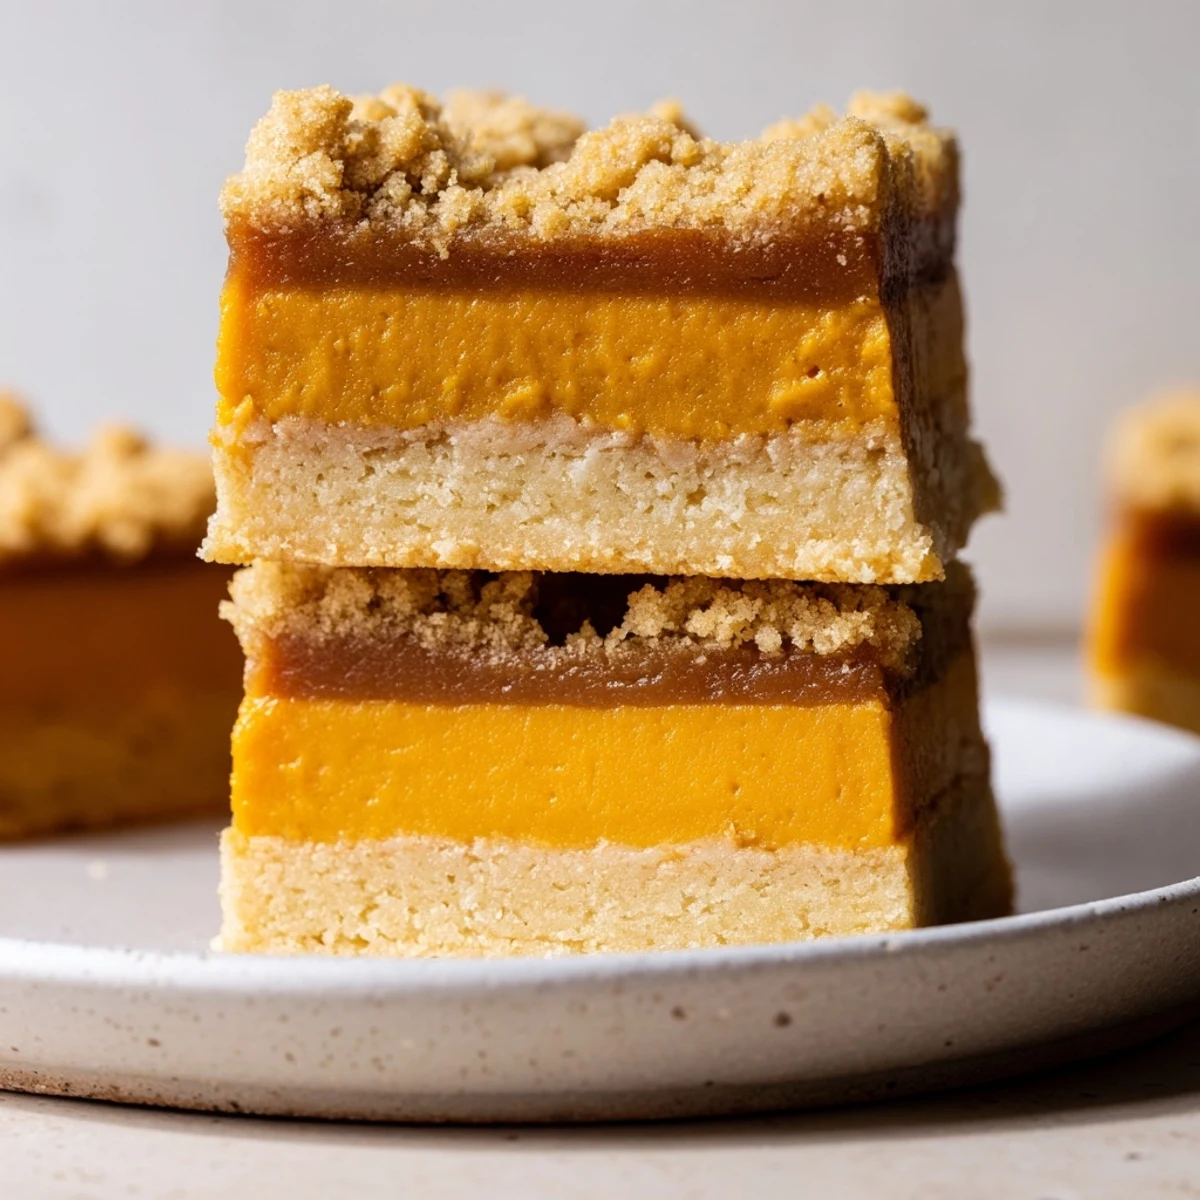
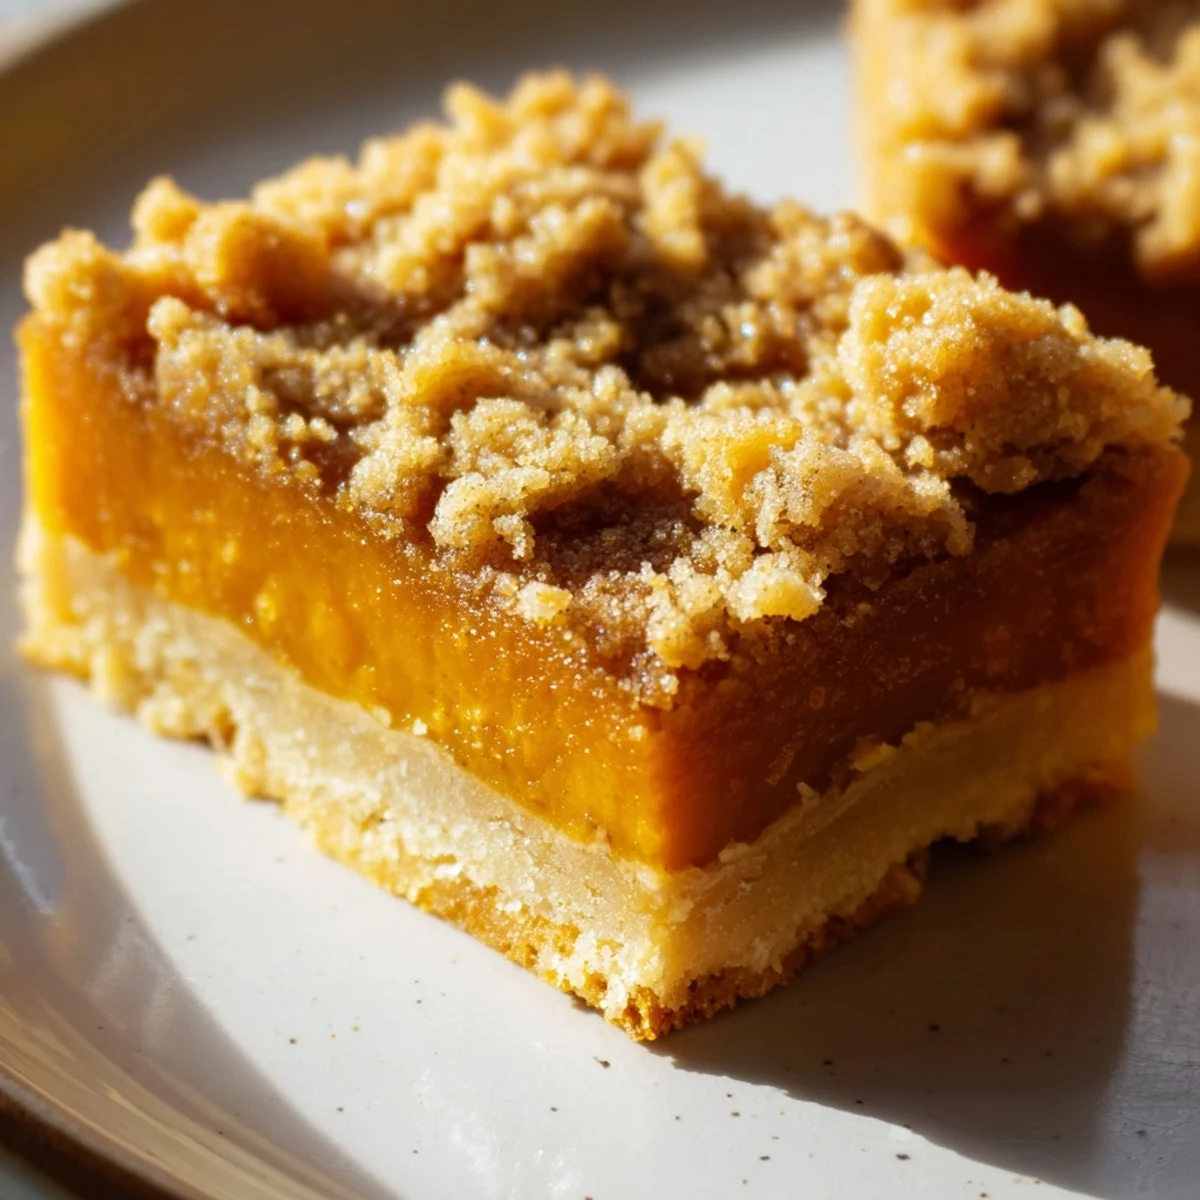
 These indulgent bars feature three irresistible layers starting with a crumbly butter crust baked until golden. The middle layer combines smooth pumpkin puree with pure maple syrup and warm pumpkin pie spice for classic autumn flavors. A brown sugar and cinnamon streusel crowns each bar, creating a crunchy contrast to the creamy filling below.
Ready in just over an hour with only 20 minutes of active prep, these bars are ideal for fall entertaining, holiday dessert tables, or weekend baking projects. The maple syrup adds depth while the streusel provides satisfying texture in every bite.
The first time I made these bars, my kitchen smelled like a maple syrup forest had taken up residence inside my oven. My roommate wandered in from her room, nose in the air, asking what bakery Id secretly started operating in our apartment. That warm maple-pumpkin scent has become my favorite signal that autumn has officially arrived.
I brought these to a Friendsgiving potluck last year, and honestly, I was worried they would be too sweet next to all the pies. But people kept circling back to the dessert table, and by the end of the night, the pan was empty except for a few lonely crumbs. My friend Sarah actually messaged me the next day for the recipe, which is how I know they are absolute keeper material.
Ingredients
- All purpose flour: The foundation of both crust and streusel, creating that tender crumb that holds everything together
- Brown sugar: Packed tight brings moisture and caramel depth that white sugar just cannot match
- Cold unsalted butter: Keep it ice cold for the crust to achieve those irresistible flaky layers
- Pumpkin puree: Use pure pumpkin, not pie filling, for the smoothest velvety texture
- Pure maple syrup: Real maple syrup matters here, imitation simply will not give you that authentic warmth
- Eggs: Room temperature eggs will incorporate more smoothly into the filling
- Pumpkin pie spice: If you are feeling adventurous, make your own blend with cinnamon, ginger, nutmeg, and cloves
Instructions
- Preheat and prep your pan:
- Get your oven to 350 degrees and line an 8x8 pan with parchment paper, leaving some overhang for easy lifting later.
- Build the buttery crust:
- Mix flour, brown sugar and salt, then cut in cold butter until it looks like coarse crumbs, press firmly into your pan.
- Give the crust a head start:
- Bake for 10 minutes until lightly golden while you whisk together your filling ingredients.
- Whisk up the silky filling:
- Combine pumpkin puree, maple syrup, brown sugar, eggs, pumpkin pie spice, vanilla and salt until completely smooth.
- Layer and crumble:
- Pour the pumpkin filling over your hot crust, mix up your streusel ingredients until crumbly, and sprinkle it all over the top.
- Bake until golden:
- Slide it back in the oven for 30 minutes until the center is set and the streusel is beautifully golden brown.
- Patience is everything:
- Let these cool completely in the pan before cutting, otherwise they will fall apart on you.
 Save to Pinterest
 These have become my go to when I need something that feels special but does not require me to be in the kitchen for hours. Last week I made them just because Tuesday needed something cozy, and my family looked at me like I had orchestrated a major holiday celebration.
Making Ahead
I have learned through accidental discovery that these bars improve after a night in the refrigerator. The flavors meld together and the texture becomes even more fudgy and substantial. Just wrap the whole pan tightly once cooled and slice right before serving.
Serving Suggestions
While these are absolutely perfect on their own, I have served them warm with vanilla ice cream for dessert and plain alongside morning coffee. The maple flavor plays so nicely with creamy elements, and a dusting of powdered sugar makes them look fancy with zero extra effort.
Storage and Freezing
These keep beautifully in the refrigerator for up to five days, though they have never lasted that long in my house. You can also freeze individual bars wrapped in plastic and foil for up to three months.
- Thaw frozen bars overnight in the refrigerator
- Bring to room temperature before serving for the best texture
- The freezer has saved me more than once for unexpected gatherings
 Save to Pinterest
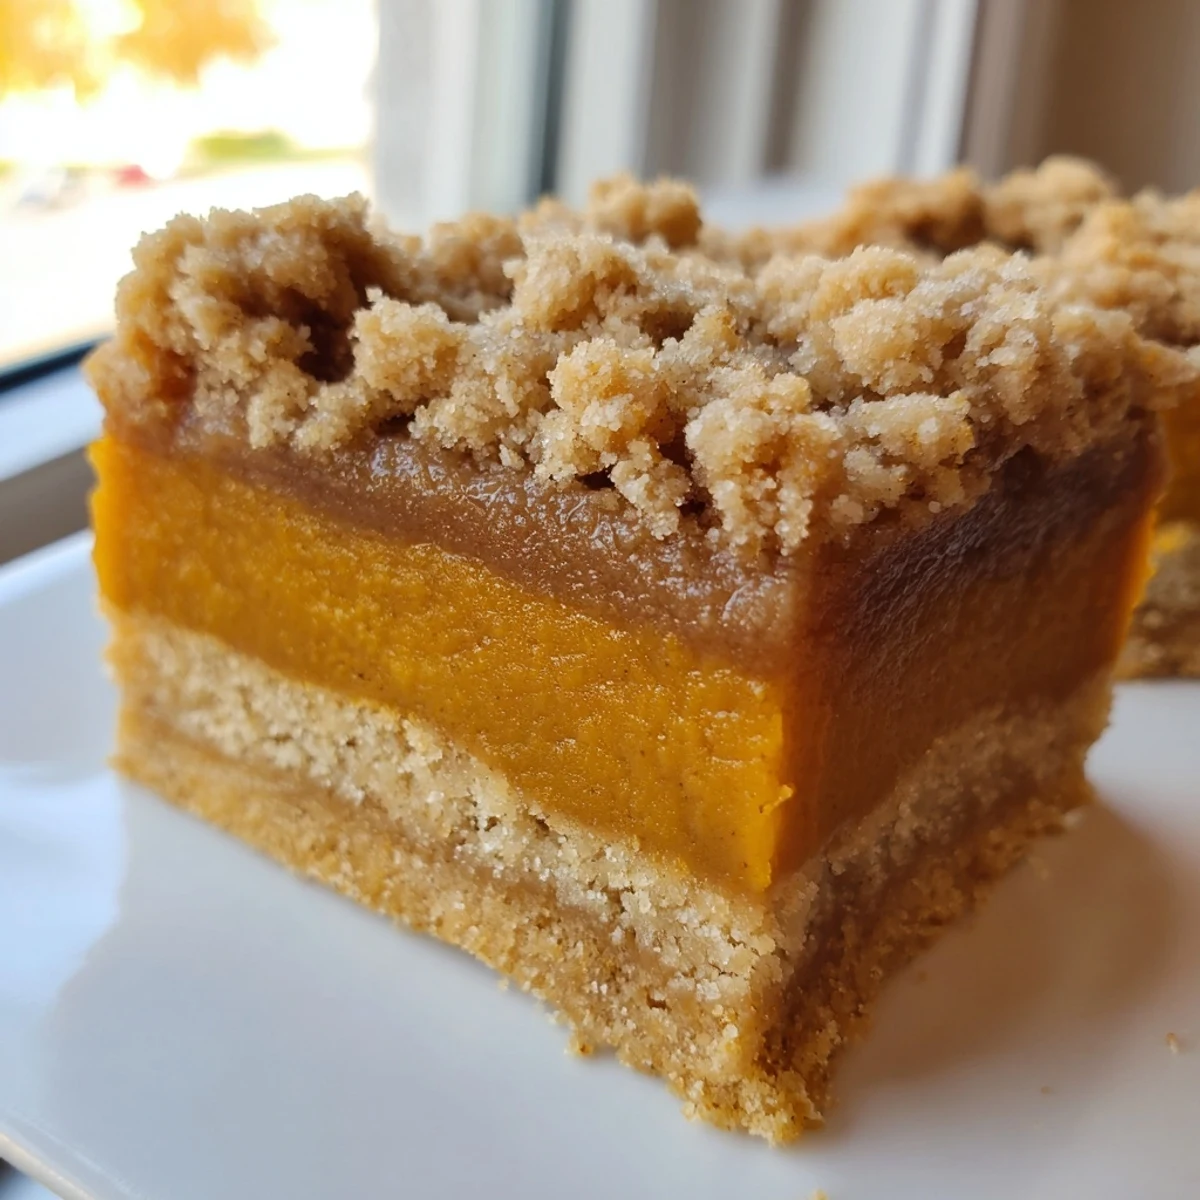
 There is something about cutting into that pan and seeing the three distinct layers that just feels like autumn on a plate. Hope these bring as much warmth to your kitchen as they have to mine.
Recipe FAQs
- → Can I make these bars ahead of time?
-
Yes, these bars keep beautifully for up to 5 days when refrigerated in an airtight container. The flavors actually develop and intensify after a day or two. You can also freeze them for up to 3 months—just thaw overnight in the refrigerator before serving.
- → What type of pumpkin should I use?
-
Use pure pumpkin puree, not pumpkin pie filling which contains pre-added spices and sugar. Canned pure pumpkin works perfectly, or you can make your own by roasting fresh sugar pumpkins and pureeing the flesh until smooth.
- → How do I know when the bars are done baking?
-
The bars are finished when the center is set and no longer jiggles when you gently shake the pan. The streusel topping should be golden brown, typically after about 30 minutes of baking time. A toothpick inserted in the center should come out mostly clean.
- → Can I add nuts to the streusel?
-
Absolutely! Chopped pecans or walnuts folded into the streusel topping add wonderful crunch and complement the maple and pumpkin flavors. Use about 1/2 cup of finely chopped nuts mixed into the streusel before sprinkling over the filling.
- → Is there a gluten-free option?
-
Yes, simply substitute the all-purpose flour in both the crust and streusel with a 1:1 gluten-free flour blend that contains xanthan gum. The texture remains just as delicious, making these accessible for gluten-free guests at your autumn gatherings.
- → What's the best way to cut clean bars?
-
Let the bars cool completely in the pan before cutting, at least 2 hours. For the cleanest cuts, refrigerate the cooled bars for 30 minutes, then use a sharp knife wiped clean between each cut. Lift the entire block out using the parchment paper handles for easier slicing.