 Save to Pinterest
 Experience the rewarding craft of creating authentic sourdough using wild yeast fermentation. This time-honored technique produces a remarkable loaf with distinctive tangy notes, a shatteringly crisp crust, and an open, airy crumb structure that develops over 12-18 hours of patient fermentation. While the extended timeline requires planning, the hands-on work is minimal and the results are extraordinary.
The process begins with autolyse, followed by rhythmic stretch-and-fold strengthening, extended fermentation, and high-heat baking in a Dutch oven for professional-quality oven spring. Perfect with salted butter, artisan cheeses, or alongside your favorite soups and stews.
The morning I first pulled a crackling sourdough from my Dutch oven, the entire apartment filled with that distinctive fermented aroma that makes your stomach growl before you even realize you are hungry. My sourdough starter had been living in a jar on my counter for months, fed religiously every morning like a tiny pet, and this was finally its moment to shine. I remember pressing my ear against the cooling loaf, listening to the faint crackling sounds continuing as the crust settled—those singing loaves are always the best ones.
My friend Sarah came over during my third attempt at sourdough, carrying salted butter and expectations. We stood in the kitchen watching the oven light, neither of us willing to leave the room even for a minute. When I finally inverted the loaf onto the cooling rack, steam rose in clouds, and she immediately reached for a slice still too hot to handle. That butter melting into the warm bread remains one of my favorite kitchen memories.
Ingredients
- Bread flour: Higher protein content than all purpose flour gives the bread structure and chewiness
- Water: Room temperature water helps the starter activate properly without shocking it
- Active sourdough starter: This is your wild yeast culture and should be bubbly and doubled in size before using
- Fine sea salt: Enhances flavor and strengthens the gluten structure for better rise
- Rice flour or extra bread flour: Prevents sticking in your proofing basket without adding unwanted flavors
Instructions
- Mix the autolyse:
- Combine flour and water in a large bowl until no dry flour remains, then cover and rest for one hour to hydrate
- Incorporate starter and salt:
- Add your active sourdough starter and salt, then squeeze the dough with your hand until everything comes together in a shaggy mass
- Stretch and fold:
- Perform four sets of stretch and folds at thirty minute intervals, grabbing one side of the dough and pulling it up before folding it over the center
- Bulk fermentation:
- Cover the bowl and let the dough rise at room temperature until it has roughly doubled in size, usually four to six hours
- Shape the loaf:
- Turn the dough onto a lightly floured surface and use your bench scraper to create tension, shaping into a tight round or oval
- Cold proof:
- Place the dough seam side up in a floured proofing basket, cover, and refrigerate for eight to twelve hours
- Preheat with Dutch oven:
- Place your Dutch oven in the oven and preheat to two hundred thirty degrees Celsius for at least thirty minutes
- Score and bake:
- Gently invert the dough onto parchment, score the top with a sharp blade, then transfer to the hot Dutch oven and bake covered for twenty minutes
- Finish baking:
- Remove the lid and bake another twenty minutes until the crust is deep golden brown and sounds hollow when tapped
- Cool completely:
- Let the bread cool on a wire rack for at least one hour before slicing to prevent the crumb from becoming gummy
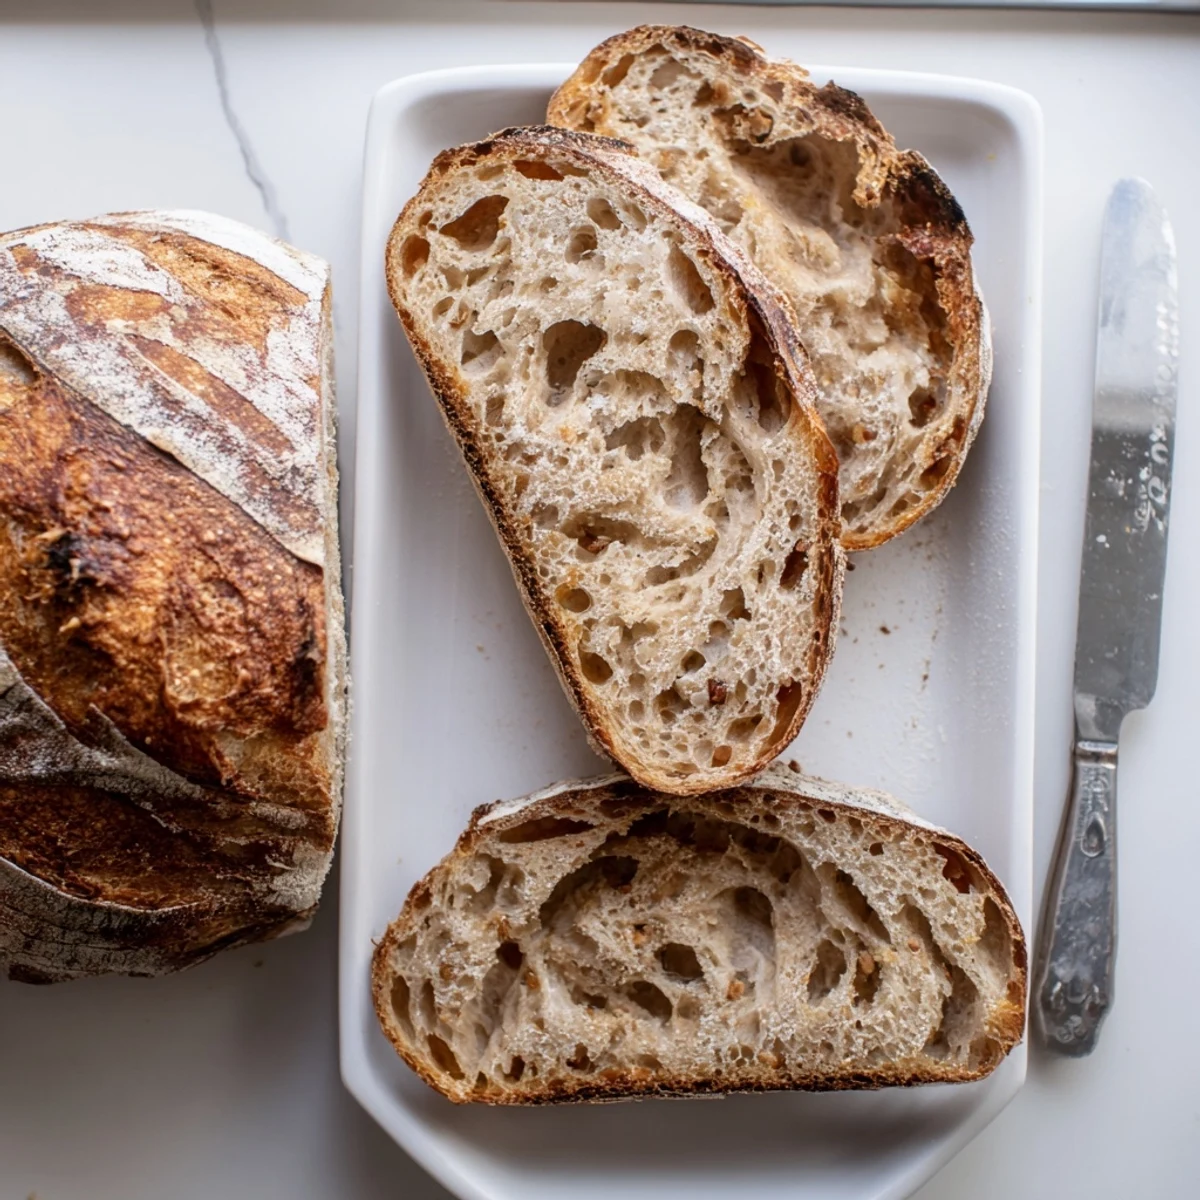
 Save to Pinterest
 This sourdough has become my go-to gift for housewarming parties and dinner invitations. There is something deeply satisfying about handing someone a loaf you nurtured from flour and water, watching them realize this is not just bread but a process and a patience you invested in them. The first time I gifted a loaf to my grandmother, a lifelong baker herself, she took one bite and asked for the recipe—the highest compliment I have ever received in the kitchen.
Understanding Your Starter
Your sourdough starter is a living colony of wild yeast and beneficial bacteria captured from flour and water. Feed it equal parts flour and water by weight at least once a week if stored in the refrigerator, or daily if kept at room temperature. A healthy starter should bubble within a few hours of feeding and have a pleasant slightly sour aroma.
Mastering the Crust
The Dutch oven method creates a steam chamber that gives your bread that professional bakery crust with dramatic oven spring. The trapped moisture keeps the crust soft initially, allowing maximum expansion, then evaporates to create a thick crunchy exterior. If you want extra crunch, you can leave the lid off for the final five minutes or mist the loaf with water before baking.
Customization Ideas
Once you have mastered the basic recipe, try incorporating toasted seeds, chopped nuts, or dried fruits after the first stretch and fold. You can also substitute up to twenty percent of the bread flour with whole wheat, rye, or spelt for added nutrition and flavor complexity.
- Rosemary and roasted garlic folded into the dough creates an aromatic savory loaf
- Cheddar cheese and jalapenos transform this into an unforgettable cheesy bread
- Replacing some water with olive oil yields a softer crust and more tender crumb
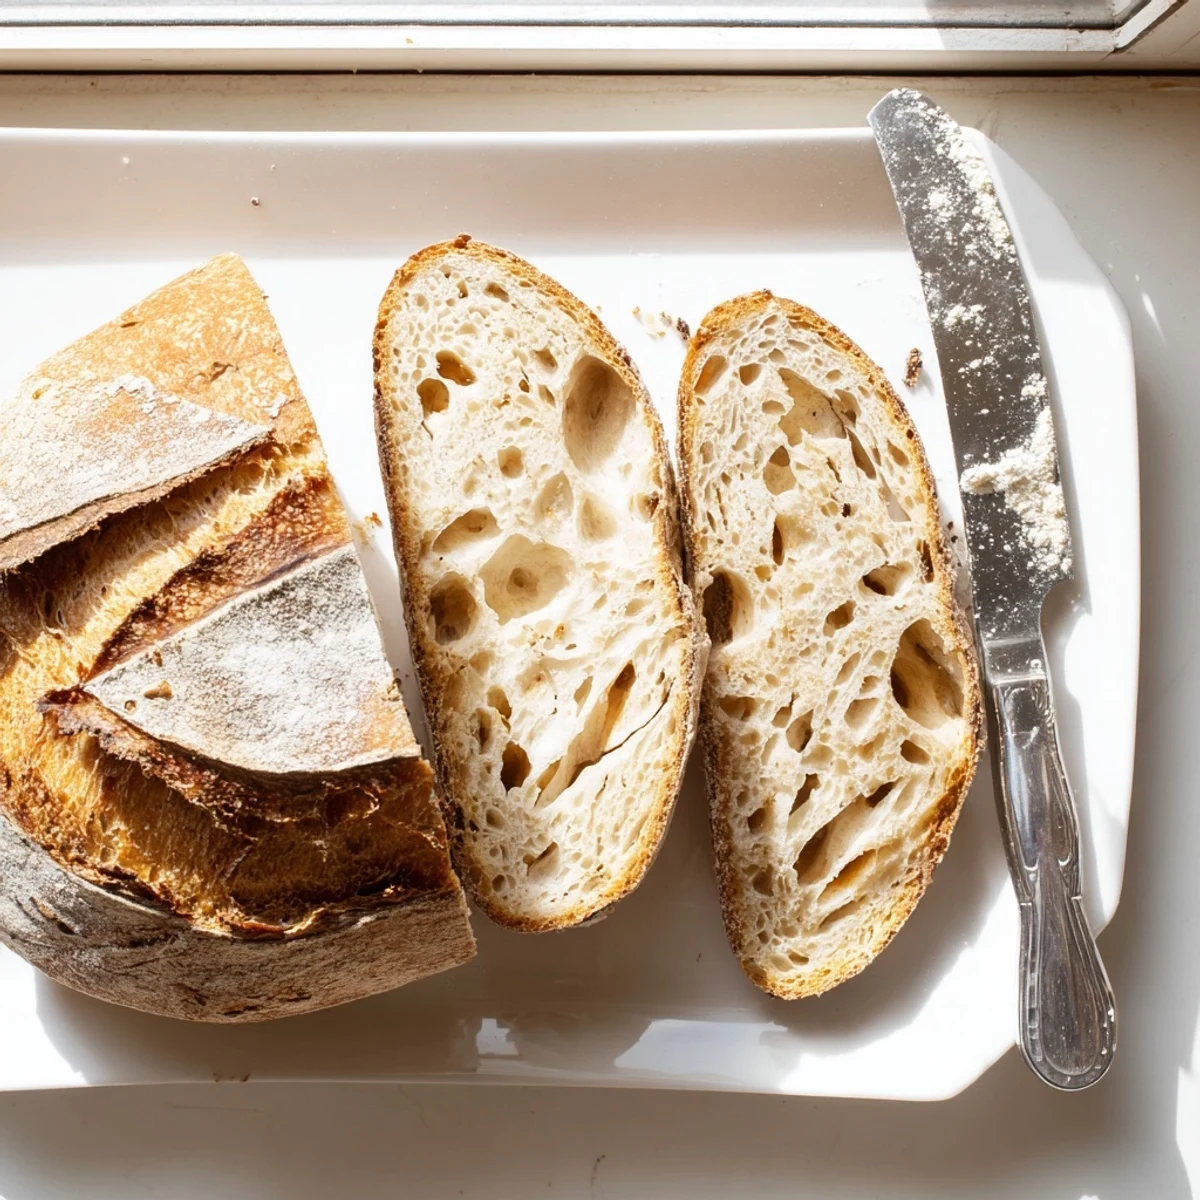
 Save to Pinterest
 There is nothing quite like slicing into a homemade sourdough loaf you have nurtured through the long fermentation process. Start with a simple spread of good salted butter and let the bread speak for itself.
Recipe FAQs
- → What makes sourdough different from regular bread?
-
Sourdough relies on wild yeast and beneficial lactic acid bacteria naturally present in flour rather than commercial yeast. This fermentation process creates distinct tangy flavors, improves digestibility, breaks down gluten, and extends shelf life significantly. The longer fermentation also develops complex aromas and a more nutritious final product.
- → Can I speed up the fermentation process?
-
While you can't rush true sourdough without compromising flavor and texture, warmer temperatures (around 24-26°C) will accelerate fermentation slightly. However, the extended timeline is essential for developing characteristic tang, proper gluten structure, and that coveted open crumb. Planning ahead yields superior results.
- → How do I know when my dough is properly proofed?
-
The poke test is reliable: gently press your flinger about ½ inch into the dough. If it springs back slowly and leaves a small indentation, it's ready. If it springs back quickly, it needs more time. If it doesn't spring back at all, it's over-proofed. The dough should also look visibly puffy with increased volume.
- → What if I don't have a Dutch oven?
-
A Dutch oven creates the ideal steam environment for crust development, but you can improvise. Place a metal baking sheet on the lowest oven rack while preheating, then pour ice water into it when loading your dough. Alternatively, bake under an overturned stainless steel bowl or clay pot for the first 20 minutes.
- → How should I store my finished loaf?
-
Store at room temperature in a paper bag or wrapped in a clean kitchen towel for up to 3 days. The crust will soften naturally—refresh it in a 200°C oven for 5-10 minutes if desired. Avoid plastic bags as they trap moisture and make the crust soggy. For longer storage, slice and freeze in freezer bags.
- → Why is my bread dense instead of airy?
-
Dense loaves often result from under-proofing, insufficient stretch-and-fold development, or cutting into the bread while too hot. Ensure your starter is actively bubbling before mixing, perform thorough stretch-and-folds, and allow adequate fermentation time. Also crucial: let the loaf cool completely (at least 1 hour) before slicing.