 Save to Pinterest
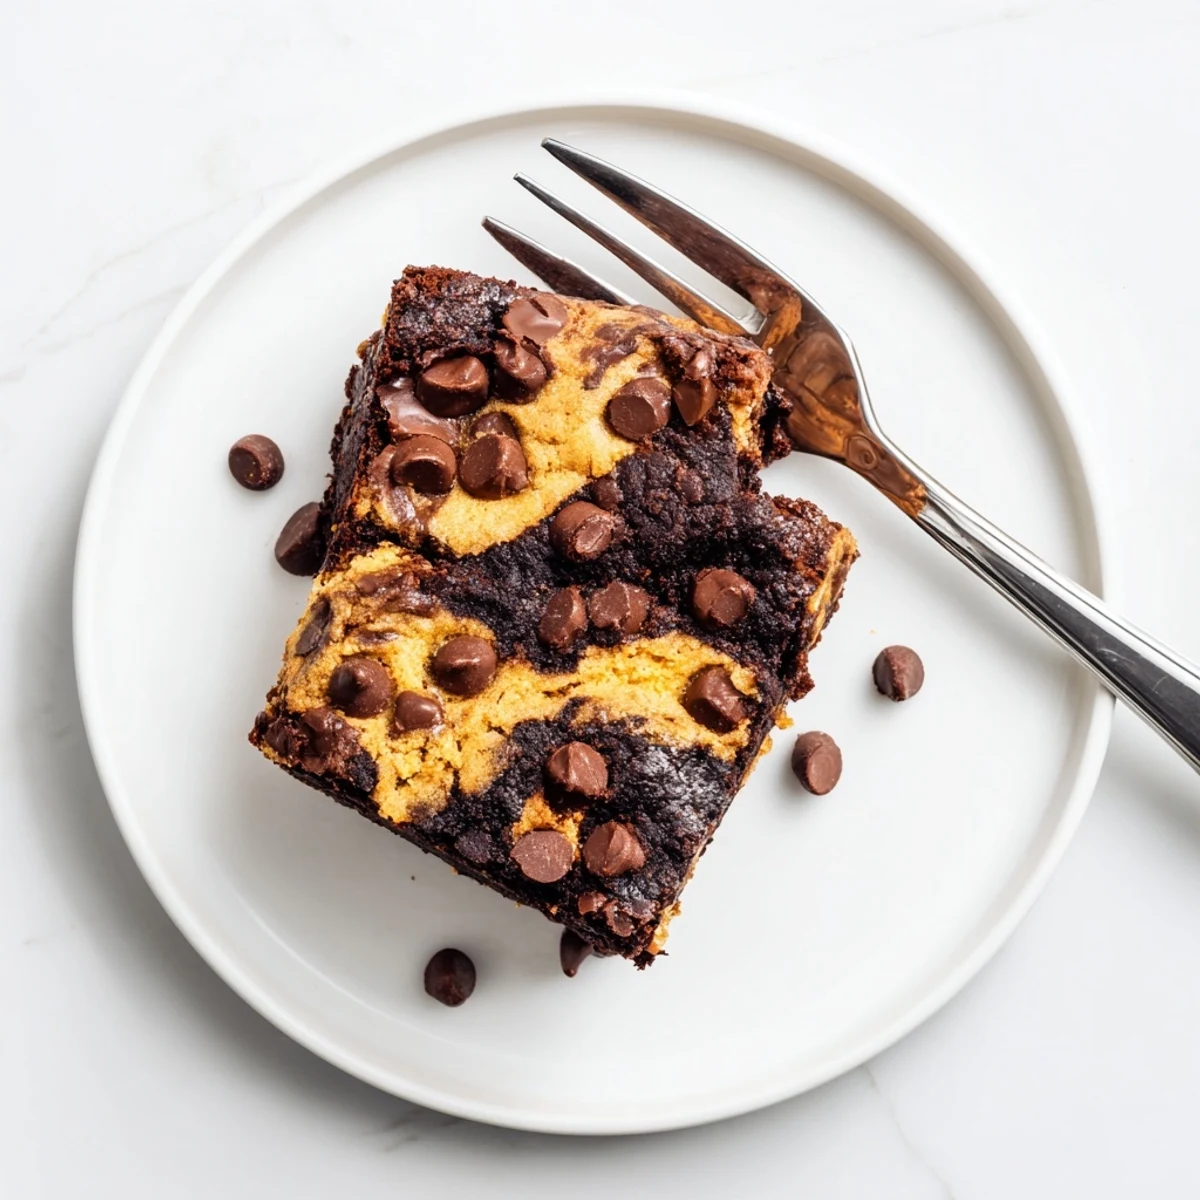
 Experience the perfect marriage of two beloved treats in one pan. The bottom layer delivers intensely fudgy brownie goodness with melted butter and cocoa powder, while the topping features classic chewy cookie dough with brown sugar for that irresistible texture. After 30 minutes in the oven, you'll have bars with crackly cookie tops, fudgy centers, and chocolate chips throughout. The key is pulling them from the oven when moist crumbs cling to your toothpick—slightly underdone ensures that signature chewiness. Let them cool completely before cutting into clean squares that showcase the beautiful two-layer distinction.
My kitchen smelled like a bakery heist gone right the afternoon I discovered brookies. I had half a batch of brownie batter and leftover cookie dough staring each other down on the counter, and instead of choosing, I layered them into the same pan. The result was a thick, fudgy, chewy slab of chocolate chaos that disappeared before dinner even hit the table.
I brought a pan of these to a potluck once and watched three adults quietly argue over the last corner piece. Someone tried to hide it under a napkin, which I took as the highest compliment a dessert can receive.
Ingredients
- Unsalted butter (brownie layer 115 g, cookie layer 110 g): Use good quality butter here because it carries the flavor in both layers, and melting it for the brownie part creates that dense fudgy texture we are after.
- Granulated sugar (brownie 150 g, cookie 50 g): This keeps the brownie layer glossy and helps the cookie tops develop those crisp golden edges.
- Light brown sugar (brownie 75 g, cookie 100 g): Packed brown sugar adds moisture and a subtle caramel depth that makes both layers taste richer than they have any right to be.
- Eggs (3 total): Two go into the brownie batter for structure and richness, while one binds the cookie dough together, and they should be at room temperature for even mixing.
- Vanilla extract (2 tsp total): Do not skip this because it rounds out the chocolate and makes everything smell like a proper bakery.
- All purpose flour (brownie 65 g, cookie 130 g): The brownie uses very little to stay fudgy, while the cookie needs more for that classic chewy bite.
- Unsweetened cocoa powder (30 g): This is the soul of the brownie layer, so use a decent brand and sift it to avoid any bitter lumps.
- Baking soda (1/2 tsp): Only in the cookie layer, giving it a slight lift and spread while the brownie stays dense underneath.
- Salt (1/2 tsp per layer): Salt is what makes chocolate taste like chocolate instead of just sweet, so be generous and accurate.
- Semisweet chocolate chips (brownie 100 g, cookie 150 g): These create pockets of melted chocolate throughout both layers, and you can swap in dark or milk chocolate depending on your mood.
Instructions
- Preheat and prepare the pan:
- Set your oven to 175 degrees C (350 degrees F) and line a 20x20 cm (8x8 inch) baking pan with parchment paper, leaving enough overhang on the sides to lift the whole thing out later like a gift you are unwrapping.
- Build the brownie batter:
- In a large bowl, whisk the melted butter with granulated and brown sugars until the mixture looks smooth and slightly glossy, then beat in the eggs one at a time followed by the vanilla until everything is well combined and shiny.
- Add the dry ingredients to the brownie:
- Sift in the flour, cocoa powder, and salt, then fold gently with a spatula just until you stop seeing dry spots, because overmixing will make the brownie layer tough instead of fudgy.
- Spread and set the brownie base:
- Pour the batter into your prepared pan and spread it into an even layer using the back of a spoon or spatula, getting it all the way into the corners.
- Mix the cookie dough:
- In a separate bowl, cream the softened butter with both sugars until light and fluffy, then beat in the egg and vanilla until the mixture looks creamy and uniform throughout.
- Finish the cookie layer:
- Stir in the flour, baking soda, and salt until just combined, then fold in the chocolate chips, resisting the urge to eat the dough straight from the bowl.
- Layer and swirl:
- Drop spoonfuls of cookie dough evenly over the brownie batter and gently spread with your fingers or a spoon, leaving some gaps so the brownie peeks through in patches.
- Bake until just right:
- Bake for 28 to 32 minutes until the top is lightly golden and a toothpick inserted in the center comes out with moist fudgy crumbs clinging to it, not wet batter, then cool completely in the pan before slicing.
 Save to Pinterest
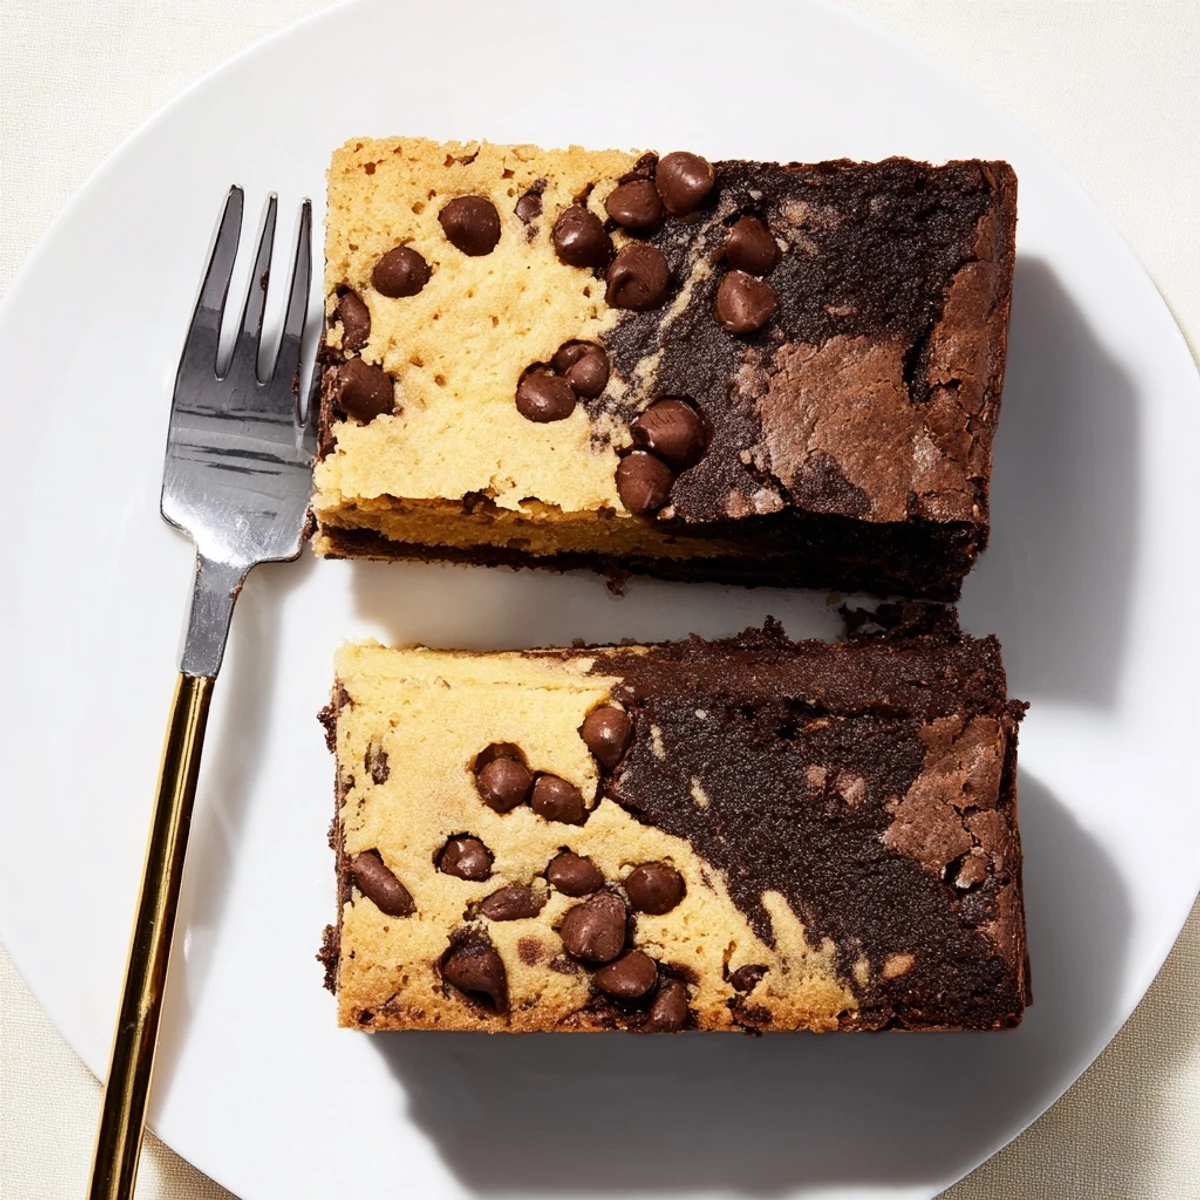
 The moment I lifted the parchment overhang and saw those two distinct layers staring back at me was the moment I understood why people bother making dessert from scratch at all.
Choosing Your Chocolate
The type of chocolate chips you use quietly changes the whole personality of this dessert. Semisweet gives you that classic balanced flavor, but dark chocolate chips make the brownie layer taste more intense and sophisticated. Milk chocolate turns everything sweeter and softer, which kids absolutely love.
Getting The Texture Right
The trick to nailing both textures in one pan is all about how you handle each batter separately. The brownie layer should be mixed as little as possible once the flour goes in, while the cookie dough needs enough creaming to get fluffy but not so much that it spreads into a thin crust.
Serving And Storing
These squares are outrageously good served slightly warm with vanilla ice cream melting over the top, but they also hold up beautifully at room temperature for days.
- Store leftovers in an airtight container at room temperature for up to four days.
- Freeze individual squares wrapped tightly in plastic wrap for up to three months.
- Always cool completely before cutting so the layers set cleanly and do not smear together.
 Save to Pinterest
 Make these once and you will never again have to choose between brownies and cookies, which is really the only promise that matters.
Recipe FAQs
- → What's the difference between brookies and regular brownies?
-
Brookies combine two distinct layers: a rich fudgy brownie base topped with chewy chocolate chip cookie dough. This creates unique texture contrasts you won't find in traditional brownies alone.
- → How do I know when brookies are done baking?
-
Insert a toothpick into the center—it should come out with moist fudgy crumbs, not wet batter. The top will be lightly golden. These continue setting as they cool, so avoid overbaking.
- → Can I make these ahead of time?
-
Absolutely. Store cooled squares in an airtight container for up to 5 days. They actually improve after a day as flavors meld. You can also freeze individually wrapped portions for up to 3 months.
- → What type of chocolate works best?
-
Semisweet chips provide balanced sweetness, but feel free to experiment. Dark chocolate adds sophistication, milk chocolate creates sweeter results, or mix chopped bars for varied melt pockets throughout.
- → Why should I let brookies cool completely before cutting?
-
Warm brookies are fragile and will crumble. Cooling allows both layers to set properly, ensuring clean cuts that showcase the distinct brownie and cookie sections. Room temperature also intensifies the fudgy texture.
- → Can I add mix-ins to either layer?
-
Certainly. Try chopped walnuts or pecans in the brownie layer, or swap some chocolate chips for white chocolate chunks. Just keep total additions under 1 cup per layer to maintain proper texture.